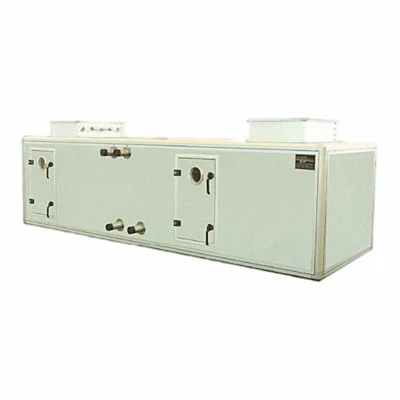

Hey there! As a supplier of galvanized metal ducts, I've seen firsthand how important it is to have a well - installed duct system in a laboratory environment. Labs are unique places where proper ventilation is crucial for safety and the accuracy of experiments, and a galvanized metal duct can be a great solution. In this blog, I'll walk you through the steps of installing a galvanized metal duct in a lab.
Step 1: Planning and Measurement
Before you even start thinking about installing the duct, you need to do some careful planning. First off, figure out the layout of your laboratory. You'll want to identify where the air intake and exhaust points are. Labs usually have specific areas where fumes are generated, like near chemical workbenches or equipment that produces heat. These are the spots where you'll need to place your intake ducts.


Measure the distance between the intake and exhaust points. Make sure to account for any obstacles like support beams, pipes, or electrical wiring. You don't want to run into problems later on when you're trying to install the duct. Also, consider the size of the duct you'll need. This depends on the volume of air that needs to be moved in and out of the lab. A larger lab with more equipment or higher - volume fume production will require a bigger duct.
Step 2: Gathering Materials and Tools
Once you have your plan and measurements in hand, it's time to gather the necessary materials and tools. Obviously, you'll need the galvanized metal duct itself. You can get it in different lengths and diameters. Make sure to choose a high - quality duct that's thick enough to withstand the conditions in the lab.
In addition to the duct, you'll need some accessories. For example, you'll need connectors to join different sections of the duct together. These connectors should be made of galvanized metal as well to ensure a good fit and prevent corrosion. You'll also need hangers to support the duct. These can be made of metal or other strong materials.
As for tools, you'll need a saw to cut the duct to the right length. A tin snips is a great tool for this job. You'll also need a drill to make holes for the hangers and connectors. And don't forget about a measuring tape and a level to make sure everything is straight and properly aligned.
Step 3: Preparing the Installation Area
Before you start installing the duct, you need to prepare the area where it will be placed. Clear away any debris or clutter from the path of the duct. Make sure the walls and ceilings where the hangers will be attached are clean and sturdy.
If there are any existing pipes or wiring in the area, you'll need to protect them. You can use insulation or other protective materials to prevent the duct from rubbing against them. This is important to avoid any damage to the pipes or wiring, which could lead to serious problems in the lab.
Step 4: Installing the Duct
Now it's time to start installing the duct. Begin by attaching the hangers to the ceiling or walls at the appropriate intervals. Make sure they are level and secure. Then, start placing the sections of the duct on the hangers. Use the connectors to join the sections together. Make sure the connections are tight to prevent air leaks.
As you're installing the duct, pay attention to the bends and curves. Labs often have complex layouts, so you may need to use elbows or other fittings to navigate around obstacles. When making bends, make sure the duct doesn't kink or restrict the airflow.
Step 5: Adding Accessories
Once the main duct is installed, it's time to add some accessories. One important accessory is the Smoke Exhaust Fire Damper. This damper is designed to close automatically in case of a fire, preventing the spread of smoke and fire through the duct system. It's a crucial safety feature in a laboratory environment.
Another useful accessory is the Adjustable Air Diffuser. This allows you to control the direction and volume of the air flowing out of the duct. You can adjust it to ensure that the air is evenly distributed throughout the lab.
And don't forget about the Fire Resistant Smoke Damper. Similar to the smoke exhaust fire damper, it provides an extra layer of protection against fire and smoke.
Step 6: Testing and Inspection
After the installation is complete, it's important to test the duct system. Turn on the ventilation system and check for any air leaks. You can use a smoke pencil or other similar tools to detect leaks. If you find any leaks, seal them with duct tape or other appropriate sealants.
Inspect the entire duct system to make sure everything is secure and properly installed. Check the hangers, connectors, and accessories to ensure they are in good condition. Make sure the dampers are functioning correctly and can close and open as needed.
Step 7: Maintenance
Once the duct system is up and running, regular maintenance is essential. You should clean the duct periodically to remove any dust, debris, or contaminants. This will help maintain the efficiency of the ventilation system and prevent any blockages.
Inspect the duct and its accessories regularly for signs of wear and tear. Replace any damaged parts as soon as possible to ensure the safety and functionality of the system.
If you're looking to install a galvanized metal duct in your laboratory, we're here to help. We offer high - quality galvanized metal ducts and all the necessary accessories. Our team of experts can provide you with advice and support throughout the installation process. If you're interested in purchasing our products or have any questions, don't hesitate to reach out. We're ready to have a chat with you and discuss how we can meet your needs.
References
- "Ventilation in Laboratories: A Guide", National Institute for Occupational Safety and Health
- "Galvanized Metal Duct Installation Manual", Industry Standards Publication