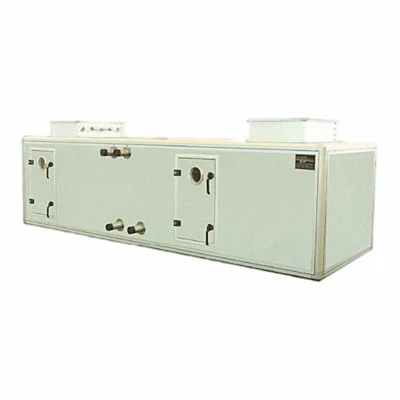

As an air conditioning unit supplier, I often receive inquiries from customers about various maintenance and replacement issues. One of the most common questions is how to replace the compressor of an air conditioning unit. In this blog post, I'll share a detailed guide on this process, ensuring that you can handle the task safely and effectively.
Understanding the Compressor
Before we dive into the replacement process, it's crucial to understand the role of the compressor in an air conditioning unit. The compressor is the heart of the system. It compresses the refrigerant, increasing its pressure and temperature. This high - pressure refrigerant then moves through the condenser, where it releases heat and turns into a liquid. The liquid refrigerant then passes through an expansion valve, which reduces its pressure and temperature, and finally enters the evaporator, where it absorbs heat from the indoor air.
Tools and Materials Needed
To replace the compressor, you'll need the following tools and materials:
- A set of wrenches: Different sizes are required to disconnect and connect various components.
- A refrigerant recovery machine: This is essential for safely removing the refrigerant from the system.
- A vacuum pump: To evacuate the system after the compressor replacement.
- A new compressor: Make sure it is compatible with your air conditioning unit. You can consult the unit's manual or contact our support team for guidance.
- Refrigerant: The appropriate type and amount as specified by the unit's manufacturer.
- Safety equipment: Gloves, safety glasses, and a respirator to protect yourself from refrigerant exposure.
Step - by - Step Replacement Process
Step 1: Turn Off the Power
The first and most important step is to turn off the power to the air conditioning unit. Locate the circuit breaker that controls the unit and switch it off. This will prevent any electrical shock during the replacement process.
Step 2: Recover the Refrigerant
Using a refrigerant recovery machine, carefully remove the refrigerant from the system. This process should be done in accordance with environmental regulations. Improper handling of refrigerant can cause harm to the environment and is also illegal in many areas. Make sure to follow the instructions provided with the recovery machine.
Step 3: Disconnect the Compressor
Once the refrigerant is recovered, you can start disconnecting the compressor. Use the wrenches to remove the electrical connections, refrigerant lines, and mounting bolts. Label all the connections to ensure that you can reconnect them correctly later.
Step 4: Remove the Old Compressor
After disconnecting all the connections, carefully lift the old compressor out of the unit. Place it in a safe location for disposal.


Step 5: Install the New Compressor
Position the new compressor in the same location as the old one. Secure it with the mounting bolts. Reconnect the refrigerant lines and electrical connections according to the labels you made earlier. Make sure all the connections are tight to prevent any leaks.
Step 6: Evacuate the System
Use a vacuum pump to evacuate the air from the system. This is important because any air remaining in the system can cause problems with the operation of the compressor and the overall performance of the air conditioning unit. Run the vacuum pump for at least 30 minutes or as recommended by the manufacturer.
Step 7: Recharge the Refrigerant
Once the system is evacuated, it's time to recharge the refrigerant. Follow the manufacturer's instructions to add the correct amount of refrigerant to the system. Over - or under - charging the refrigerant can lead to poor performance and possible damage to the compressor.
Step 8: Test the System
Turn on the power to the air conditioning unit and test it. Check for any abnormal noises, vibrations, or leaks. Monitor the temperature and pressure of the system to ensure that it is operating correctly.
Common Issues and Troubleshooting
- Leaking refrigerant: If you notice a refrigerant leak after the replacement, check all the connections. Tighten any loose connections. If the leak persists, it may be necessary to replace the seals or gaskets.
- Abnormal noises: Unusual noises from the compressor could indicate a problem with the installation. Check if the compressor is properly mounted and if all the components are correctly connected.
- Poor cooling performance: This could be due to incorrect refrigerant charging or a problem with the compressor itself. Check the refrigerant levels and consult the manufacturer's specifications.
Our Product Offerings
As an air conditioning unit supplier, we offer a wide range of high - quality air conditioning units to meet different needs. For example, our Draw Texturing Air Conditioning Unit is designed for specific industrial applications, providing precise temperature and humidity control. Our Constant Humidity Air Handling Unit is ideal for environments where maintaining a constant humidity level is crucial. And our Environmental Control Unit HVAC offers comprehensive environmental control solutions for various settings.
Contact Us for Purchase and Consultation
If you are interested in purchasing an air conditioning unit or need further assistance with compressor replacement or any other maintenance issues, please feel free to contact us. Our team of experts is ready to provide you with professional advice and support. We can help you choose the right air conditioning unit for your needs and guide you through the installation and maintenance processes.
References
- Air Conditioning, Heating, and Refrigeration Institute (AHRI) Standards.
- Manufacturer's manuals of air conditioning units.